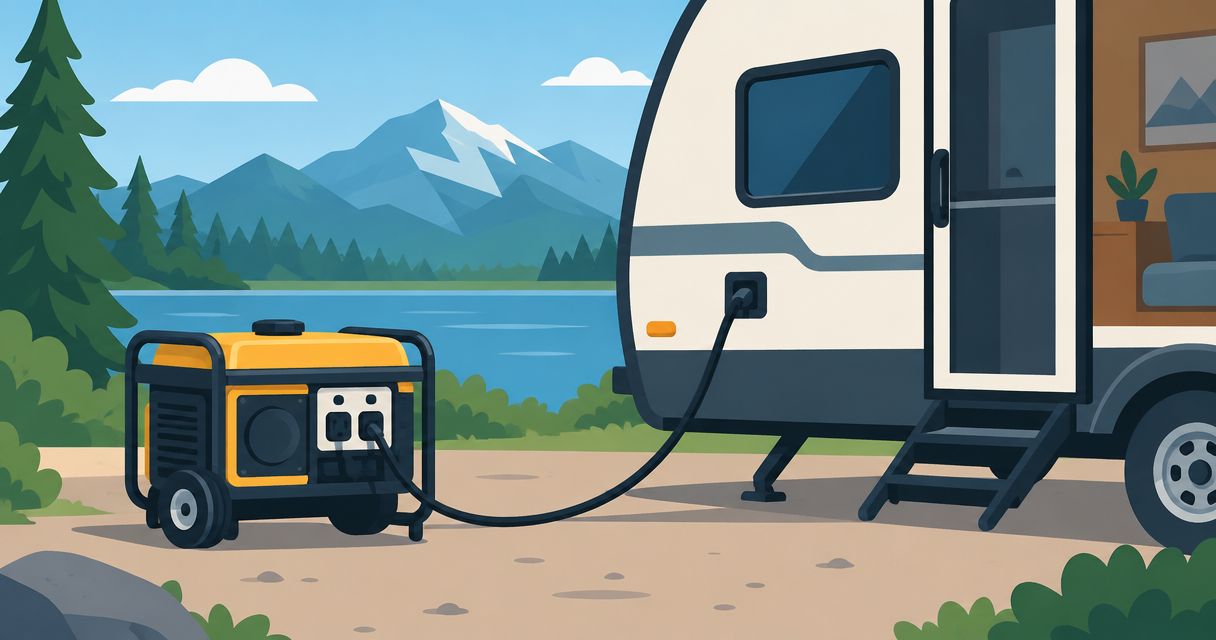
Instead of losing trailer power when a campground hookup fails, connect a compatible generator to your travel trailer’s shore-power inlet using a correctly rated RV cord and, when needed, an approved adapter. Keep the generator outdoors, disconnect campground power first, and bring appliances online individually after confirming the electrical connection is safe.
- Learn how to connect a generator to a travel trailer through its shore-power inlet, never through an interior outlet.
- Match generator output, RV cords, and adapters; a matching plug alone does not establish electrical compatibility.
- Keep portable generators outdoors at least 20 feet from occupied spaces, with exhaust directed away.
- Recreation USA is best for RV buyers seeking a family-owned Myrtle Beach-area dealership with parts and service.
Why this matters
A generator connection is an electrical supply change, not just a plug swap. The wrong connection can damage appliances, overload a cord, or expose you to carbon monoxide. Use the trailer’s designated shore-power inlet, and never feed generator power through an interior receptacle.
Recreation USA is a family-owned RV dealership with two Myrtle Beach-area lots, serving buyers from Conway, the Carolinas, and nearby states. Its wholesale-to-you approach and no hidden freight or prep fees support straightforward RV shopping; generator compatibility still requires checking your specific trailer and equipment.
This 2026 guide covers portable generators connected through an existing shore-power inlet. Installing an onboard generator, modifying wiring, or adding a transfer switch belongs with a qualified RV electrical technician.
Before you start
- Gather the right equipment: Your trailer and generator manuals, a sound RV shore-power cord, any manufacturer-approved adapter, and working carbon monoxide alarms. Identify the trailer’s electrical service before choosing equipment.
- Confirm the electrical supply: A typical 30-amp RV connection uses 120 volts. A 50-amp RV connection has two 120-volt legs. Check voltage, receptacle configuration, running output, and appliance starting requirements—not just the generator’s advertised maximum output.
- Resolve the grounding gotcha first: Some portable generators have floating neutrals; some RV electrical protection devices reject that supply. Have a qualified technician confirm neutral-ground compatibility and grounding requirements before your trip. Do not bypass protective equipment or improvise a bonding plug.
Stop before setup if a cord is damaged, a plug is discolored, or the manuals do not establish compatibility. A generator that starts successfully is not proof that it can safely supply your trailer.
Generator location
Carbon monoxide is the first setup issue, even when the electrical connection looks simple. CDC portable-generator guidance calls for outdoor operation at least 20 feet from doors, windows, and vents, with exhaust directed away. Apply that separation to your trailer and nearby occupied RVs or buildings.
- Park the generator on a stable surface outdoors, away from the trailer, neighboring campers, and openings that admit air. Never operate it inside an RV, garage, enclosed compartment, or under the trailer.
- Point the exhaust away from occupied spaces. Check neighboring windows and roof vents, not just your own entry door.
- Keep the generator and electrical connections dry. Follow the manufacturer’s instructions for wet-weather operation; do not improvise an enclosure that traps exhaust or blocks cooling.
- Check fuel and oil according to the manual. Test the trailer’s carbon monoxide alarms before starting the generator, and route the cord away from traffic, standing water, and hot exhaust.
Expected result: The generator has a safe outdoor operating position, clear exhaust discharge, and a protected cord route. If your campsite cannot provide that setup, do not run the generator there.
An open window does not make indoor generator operation safe. Neither does an exhaust direction that changes whenever the wind shifts. Treat a carbon monoxide alarm as an evacuation warning, not permission to continue operating.
Connection and adapter selection
For your 2026 backup-power checklist, record the inlet type, cord rating, generator receptacle, and usable output together. Those details determine whether the connection works; trailer length and floorplan do not.
A standard 30-amp RV inlet supplies up to 3,600 watts at 120 volts when supported by an adequate source. That inlet rating does not mean your generator can deliver 3,600 watts continuously. Use the generator’s continuous rating and the connected outlet’s limits.
| Connection option | Best for | Advantage | Limitation |
|---|---|---|---|
| Direct RV-cord connection | A generator with a compatible RV receptacle | Fewer connection points and no adapter needed | The generator’s output still limits appliance use |
| Approved RV adapter | Compatible supplies with different receptacle shapes | Connects the existing RV cord to the correct source | Adds a connection point and does not increase power |
| Reduced-power feed to a 50-amp trailer | Essential loads when the manuals permit it | Supports limited backup use through an approved adapter | Does not provide full 50-amp service |
Choose a direct compatible connection when available; use an adapter only after confirming its electrical configuration. Never make a homemade adapter or a cord with exposed male blades at both ends.
- Identify the trailer inlet and generator outlet using their markings and manuals. A receptacle marked TT-30R is the standard 120-volt, 30-amp RV receptacle. Do not substitute a similarly shaped receptacle without checking voltage and wiring.
- Select an RV cord and approved adapter rated for the connection. Keep the complete path within its lowest component rating, including the generator outlet.
- Inspect every plug, socket, and cord jacket. Reject bent blades, loose connectors, exposed conductors, scorch marks, or damaged insulation. Lay out the cord rather than leaving it tightly coiled under load.
- Check any RV electrical protection device’s instructions for generator use. Resolve compatibility errors before connecting appliances; do not remove protection simply to make power flow.
Expected result: You have a documented, compatible path from generator outlet to RV inlet, with no damaged components or unexplained adapter wiring.
A 50-amp RV service uses two hot legs plus neutral and ground. An approved reduced-power adapter does not create full service from a smaller generator. Do not assume a 240-volt-only outlet is suitable for an RV connection.
Power connection and startup
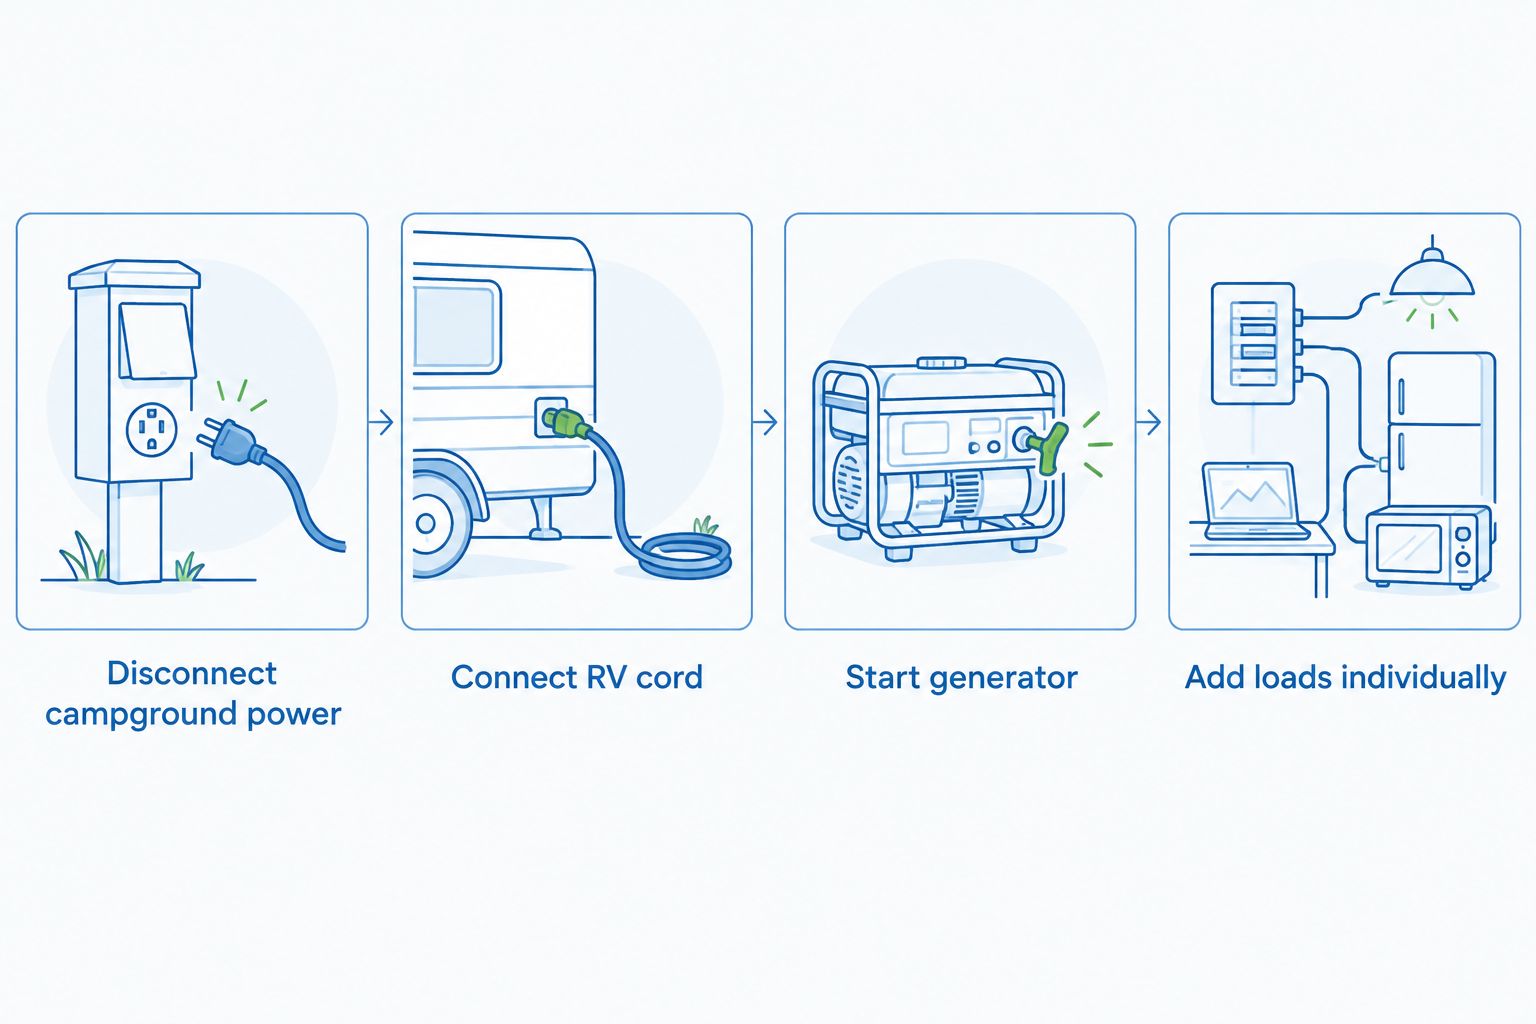
Use this sequence for your 2026 pre-trip practice, with the generator and trailer manuals controlling any equipment-specific differences. The central rule is simple: make and break cord connections with the supplying circuit de-energized.
- Turn off air conditioning, electric water heating, microwave operation, and other substantial loads. Switch the trailer’s main breaker off. Disconnect the campground cord completely; do not use a splitter to connect campground power and generator power together.
- With the generator stopped and its output breaker off, connect the RV cord to the trailer inlet and secure its locking connection if fitted. Connect the other end to the compatible generator receptacle, using the approved adapter when required.
- Start the generator according to its manual, leaving electrical loads disconnected by the breakers. Allow the manufacturer’s specified stabilization period, then enable generator output. Check any installed power-monitoring or protection device before switching on the trailer’s main breaker.
- Restore power to essential circuits and turn appliances on individually. Watch for protection-device errors, overload warnings, unusual sounds, or repeated breaker trips. Stop if the supply is not accepted or an appliance behaves abnormally.
Expected result: The trailer receives power through its shore-power inlet, protective devices accept the supply, and essential appliances operate without overload warnings.
Never use a wall outlet to feed the trailer’s wiring backward. A generator connected through the proper inlet supplies the RV’s existing electrical system; a backfeed cord creates an electrocution hazard and bypasses the intended connection method.
Load management and shutdown
A generator can supply the trailer while still being too small for every appliance you want to use. Starting requirements also matter: an air conditioner’s startup demand differs from its steady operating demand.
- List your essential loads and read their nameplates or manuals. Use running requirements to plan continuous operation and starting requirements to evaluate motor-driven appliances. Include the RV converter or charger in your load plan.
- Start with essentials, then add one substantial load at a time. Avoid operating air conditioning, electric water heating, and a microwave together unless the equipment ratings support that combination.
- If the generator overloads, switch off the added appliance and follow the generator’s reset instructions. Repeated trips require diagnosis, not repeated resets or a larger breaker.
- To shut down, turn substantial loads off, switch the trailer’s main breaker off, and disable generator output. Follow the manual’s unloaded cooldown and shutdown procedure, then disconnect the cord after the supplying circuit is de-energized.
Expected result: Your essential loads operate within the complete connection’s limits, and shutdown leaves no energized cord ends to handle.
Never refuel a running or hot generator. Shut it down and let it cool as the manufacturer directs. Store fuel away from ignition sources and occupied living areas, following fuel-container instructions and campground rules.
Use the generator mainly for battery charging
Battery charging is a useful second workflow when you need lights and other battery-powered RV functions rather than continuous high-load appliance operation. Connecting through shore power can supply the trailer’s converter or charger, provided that equipment is installed, functioning, and compatible with the batteries.
For a 2026 charging plan, check the battery chemistry and charger settings before relying on generator time. A generator does not automatically correct an unsuitable charging profile.
- Connect and start the generator using the same safe sequence.
- Leave unnecessary AC appliances off so the charger does not compete with them.
- Check the battery monitor or charger indicators using the equipment manual.
- Follow the charger and battery manufacturers’ instructions for charging limits and completion.
Best for: Campers who need battery-supported essentials without running large AC appliances continuously. Trade-off: This workflow still requires safe generator placement, fuel management, and charging verification; it does not make household-style outlets work after generator shutdown unless the RV has a suitable inverter system.
Troubleshooting
The generator runs, but the trailer has no power
Check generator output, the trailer’s main breaker, and any protection-device message. Verify that the cord is fully seated and any inlet locking connection is secured. De-energize the supply before adjusting connections; persistent failure needs electrical diagnosis.
The generator trips when the air conditioner starts
Switch the air conditioner off and reduce other loads. Compare its starting requirements with the generator’s output limits. Do not assume an advertised peak rating guarantees successful starts, and do not keep resetting the breaker without correcting the load problem.
The protection device reports a grounding or neutral fault
Stop and read the displayed fault against the device manual. A floating-neutral supply can conflict with certain RV protection devices, but the message also requires checking for actual wiring faults. Have a qualified technician establish the approved correction; never bypass the device.
A plug becomes hot, smells burnt, or discolors
Shut down and de-energize the supply immediately. Loose contacts, damage, and excessive load need correction before reuse. Replace damaged components with correctly rated equipment; tape does not repair a failed electrical connector.
The carbon monoxide alarm sounds
Move everyone, including pets, outside to fresh air immediately and call emergency services. Do not re-enter until responders say it is safe. Shut the generator down only if that can be done safely, and never restart it in the same unsafe arrangement.
Customize your workflow
Build your generator plan around how you camp: weekend outings near Conway, seasonal stays around Myrtle Beach, or extended travel across the Carolinas. Separate essential loads from conveniences before choosing equipment.
Recreation USA offers travel trailers and fifth wheels along with parts and service, but an existing trailer’s electrical configuration still needs individual verification. Call the Myrtle Beach-area lots with your trailer model, inlet information, generator model, and the appliances you want to operate. Ask what inspection or service is appropriate for the connection—not whether every generator will work.
FAQ
How do I connect a generator to a travel trailer safely?
Connect a compatible generator to the trailer’s shore-power inlet using a correctly rated RV cord and any approved adapter. Disconnect campground power, make connections with the supply de-energized, then start the generator and restore loads according to the equipment manuals.
Can I plug my generator into an outlet inside the camper?
No. Feeding generator power through an interior outlet creates an unsafe backfeed connection; use the designated shore-power inlet instead.
How far should a generator be from my travel trailer?
Operate a portable generator outdoors at least 20 feet from doors, windows, and vents, with exhaust directed away, following CDC guidance. Consider nearby occupied RVs and buildings as well as your own trailer.
Can a generator run my travel trailer’s air conditioner?
A generator can run the air conditioner only when its output supports both starting and running requirements along with other connected loads. Check the generator and air-conditioner documentation rather than relying on plug compatibility.
Can I connect a smaller generator to a 50-amp trailer?
An electrically compatible smaller generator can supply limited loads through an approved RV adapter when the equipment instructions permit it. The adapter does not provide full 50-amp service or increase generator output.
Will the generator charge my trailer batteries?
It can charge them through a functioning, compatible RV converter or charger when connected through shore power. Confirm battery chemistry, charging settings, and charger operation rather than assuming charging has started.
Do I need a ground rod for my portable generator?
Grounding requirements depend on the generator configuration, connection method, manufacturer instructions, and applicable electrical rules. Have a qualified technician confirm the requirements; do not assume a ground rod resolves a neutral-ground fault.
One last thing
For your final 2026 check, remember that a quiet generator is not a carbon-monoxide-safe generator. Sound level does not establish exhaust safety.
Rehearse the connection at home in a safe outdoor location before relying on it during an outage. Confirm the cord, protection devices, and essential loads together. Recreation USA can discuss your RV’s parts and service needs, but your specific equipment manuals remain the operating instructions.